
I think the most intimidating thing about pintucks is that they are all usually uniform. Whether on a pillow or shirt or wherever, you see them in nice, neat, even little rows....but they don't have to be neat or even or intimidating. Here's a fun little project for you to get started with pintucks.
We're going to be creating a fun pillow cover that looks clean and neat and we are not going to measure our pintucks at all...HOW CRAZY IS THAT?...it's not crazy..it's fun and creative and full of whimsy. Keep in mind that I'm using a zippered back for my cover which you can find the tutorial for here.
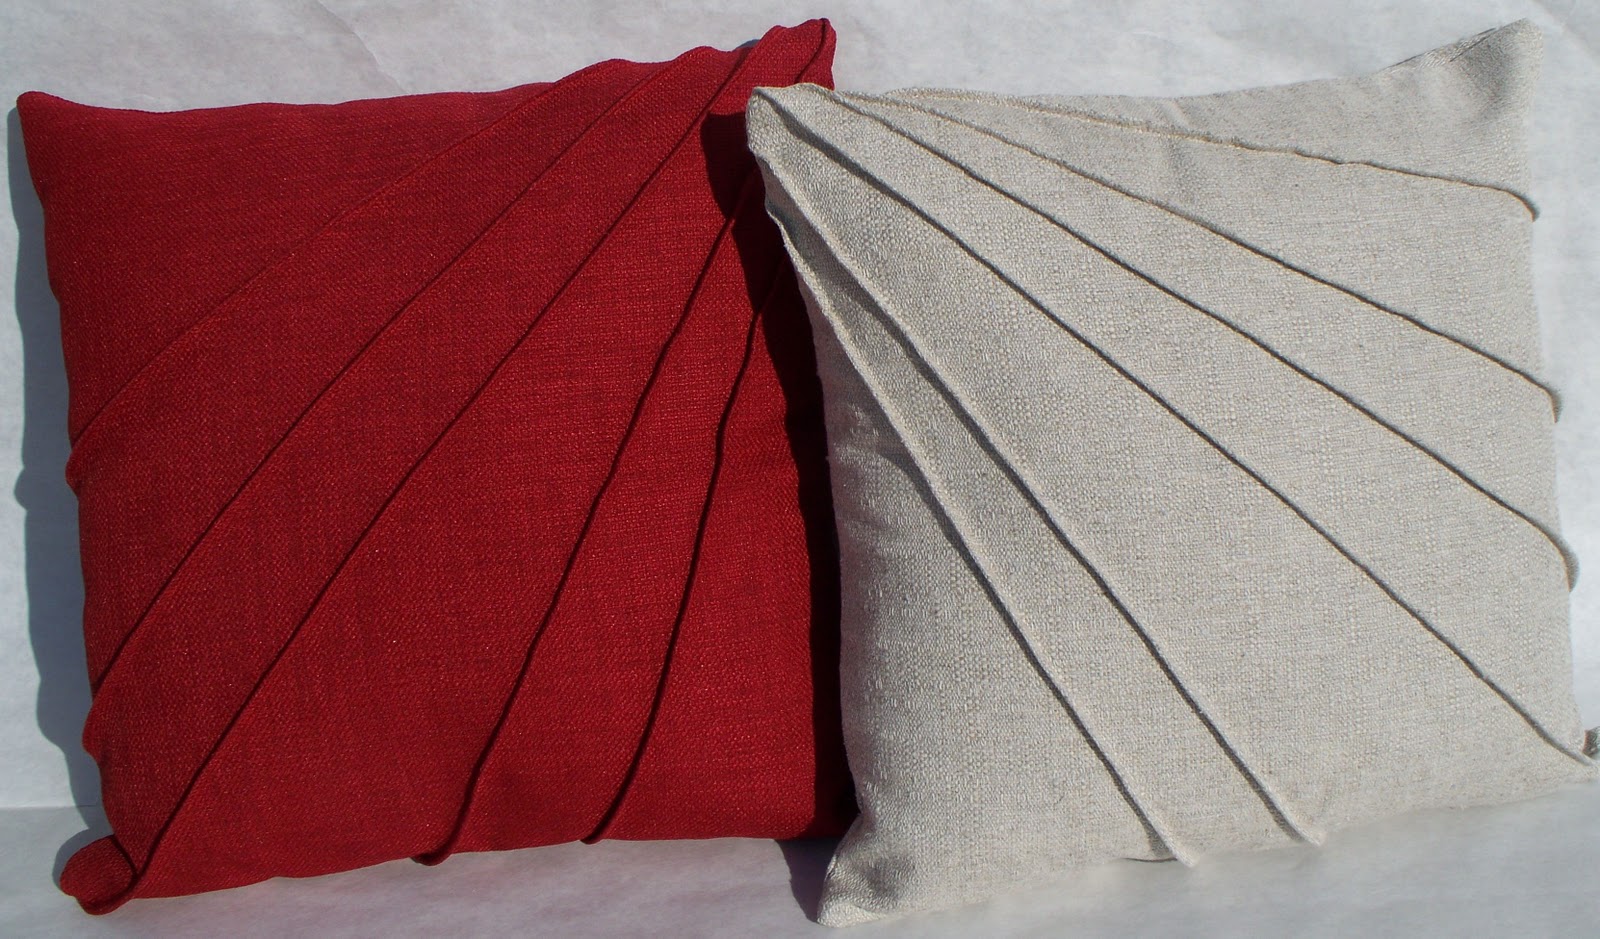
Star-Burst Pintuck Pillow Cover Tutorial
Supplies
Fabric for front
Fabric for back
Fabric for back
Ruler
Rotary Cutter & Mat or Scissors
Sewing Machine
Coordinating Thread
Cut fabric for the front of your pillow cover to size ( size of pillow + seam allowance + 3")
My pillow is 14". So, I cut my fabric 17.5" square. (14" + .5" + 3")
If you're going to make a hundred pintucks and make them run every which way..you may want to add more than 3" to your measurements..at least the first time.
Cut the fabric for the back of your pillow cover to size (size of pillow + seam allowance)
My pillow back is 15" square AFTER I added a zipper....tutorial on zippered back here.

My pillow back is 15" square AFTER I added a zipper....tutorial on zippered back here.

Fold fabric over, wrong sides together, corner to corner as shown in picture above.

Set your needle placement to the far right. Starting at the long corner, sew along fold..about 1/8" from edge. Just go with what looks nice to you. If you like a tiny pintuck, then go smaller than 1/8".
If you are using thick tread and want a nice top stitch to show, be sure to increase your stitch length just a bit.
If you are using thick tread and want a nice top stitch to show, be sure to increase your stitch length just a bit.

Start back at the corner where you started your first stitch and continue sewing pintucks until you are satisfied.

Iron fabric folding all pintucks over to one side.
Square off your starting corner as shown above with a rotary cutter or scissors.

Square off the rest of your fabric.
My finished fabric is 15" square.
My finished fabric is 15" square.

Pin cover backing to cover front.
Finish edges and trim corners.
Be sure to leave the zipper OPEN before you sew your cover shut as indicated in the picture above. The zipper allows you to turn your cover right side out after you sew all four sides shut.


Your Done!
Finish edges and trim corners.
Be sure to leave the zipper OPEN before you sew your cover shut as indicated in the picture above. The zipper allows you to turn your cover right side out after you sew all four sides shut.


Your Done!
Linking up to:


The pleating is amazing! Love it!
ReplyDeleteThanks, Maureen!
ReplyDeleteI love how simple this is. I'm really tactile so I love pillows I can 'pet' Thank for sharing, your whole blog is awesome, I'm your newest follower from My 1929 Charmer
ReplyDeletehttp://chickenscratchny.blogspot.com/
Wow, this looks so good! You have such precision with the pintucks. I wish I could sew like that! I host a party on Fridays. I would love if you linked up!
ReplyDeletehttp://daysofchalkandchocolate.blogspot.com/2012/01/latest-and-greatest-13.html
Very lovely, I love to sew, and this project will be on my to do list this year. So simple, yet so beauty, and I love pintucks, this projects will not be intimidating! Thanks so much for sharing your creativeness with Sunday's Best!
ReplyDeleteI featured your pretty pillows today!
ReplyDeletehttp://daysofchalkandchocolate.blogspot.com/2012/01/features-from-latest-and-greatest.html
I hope you'll stop by for my button and to link up to tomorrow's party!
Had to pin this - I LOVE tucks! I found you from days of chalk & chocolate!
ReplyDeleteThanks for the pin Cameron...and thanks for stopping by.
ReplyDeletethis is great! I'd love you to add it to my what we wore and made party over at http://raegunwear.blogspot.com/search/label/WWWMW
ReplyDeleteReally cute pillows!!! I'm having a linky party, and would love it if you joined! Here is the link! http://www.thesouthernproductqueen.com/one-stop-shoppe-linky-party-3 Thanks for sharing!
ReplyDelete