I recently had a custom order from a lovely woman celebrating her 20 yr anniversary with a ceremony and reception. I must be honest,...at first I wasn't sure about the colors. But, when I got the paper home and started working on them, I fell in love! Now, I can't wait for my 20 yr. anniversary....so my colors can reflect the fire and passion my marriage still has after all those years...how sweet! Here are the flowers I made for her:
I feel so privileged to be a part of her wedding. I posted a tutorial HERE on how to make your own paper flowers. I would love to see what you've come up with.
xo
Krista
Showing posts with label paper craft. Show all posts
Showing posts with label paper craft. Show all posts
Friday, December 9, 2011
Thursday, November 3, 2011
Vintage Paper Star Banner - Tutorial
Vintage Paper Star Banner
or
Christmas Ornament
Tutorial
I
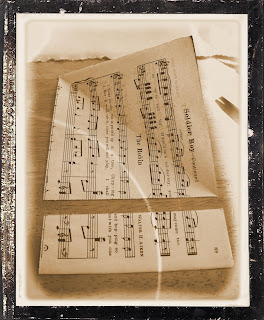
have had this vintage music book (so vintage it's probably antique) for
a long long time. It was in pretty rough shape but, I LOVED it...Just
didn't know what to do with it.....until now!
I've made these stars for a holiday decoration before, for the kids, in bright festive colors. Paper stars crafted from antique music book pages give them a whole new (grown up I might add) look and feel. I just know you're going to fall in love with them as much as I have.
Supplies
Vintage music pages
glue
dish
small craft paint brush
scissors
Make your paper squares (6)
Fold in half, corner to corner, to make a triangle. Fold over once more. Hold your triangle in your hand as shown in the picture above .
Make 3 (or more if needed) cuts into your folded edge. Be sure NOT to cut all the way through. Leave 1/4 to 3/8 inch (depending on how large your paper is) at the end. Make sure the cuts are evenly spaced and leave the same amount uncut at each end.
Open your paper square. It should look like the one above.
Place a small amount of glue in your dish. Using a small paint brush, glue the inner triangle as shown above.
Skip a strip and glue the next one, as shown in the pictures above.
Now remember, you'll be making 6 of these. I usually work on the other ones while I let these dry.
Flip your paper over and glue the two remaining strips on the opposite side as shown. Let dry. In the picture above you'll notice your paper has one side (the left) that sticks out farther than the other. We'll call this the fat side.
Now, glue three pieces of paper together, gluing the fat side to the skinny side and gluing all three points together at the bottom.
Repeat this with the other 3 pieces of paper.
Once they are dry, glue the two halves together.
Your Finished!
 |
| Here's an unedited pic for ya! |
Linked to

Thursday, October 27, 2011
3D Paper Butterfly - a tutorial
Short & Sweet & Simple
Tutorial
Cut out 3 butterflies
Need a template?
Try Google images
You will need:
glue
dish
brush
Apply glue to the wings on the back of one of the butterflies
NOT the butterfly body
Place one wing of another butterfly on your glued piece
Repeat with the third butterfly on the other side of your glued piece.
Let it dry
Flip it over
and
Your done!
Linked up to

Coffee Filter Wreath and Butterfly Away Picture
Here are a few projects I've done in the past for my girls' room....past meaning that I didn't' have the forethought to take pictures for a tutorial.
I had seen this once on a blog long long ago and can not find the source of my inspiration...this is not my own creating. Some wonderful woman out there in blogland gave me the inspiration.
I'm not finished. The girls room is going to be pink with white beadboard and I'm not sure if I want to paint this frame a darker shade of pink or white...so it will stay this way until that happens.
Next is acoffee filter brown paper lunch bag wreath, made with a scalloped circle punch and then added more butterflies. I'm not a wreath kinda gal, but I love it!..Although, it does seem to be missing something.
There you go! I'm sorry I don't have a tutorial for you, but there are a ton out there. I hope you've been INSPIRED to create something of your own.
xoxo
Krista
I had seen this once on a blog long long ago and can not find the source of my inspiration...this is not my own creating. Some wonderful woman out there in blogland gave me the inspiration.
 |
| They're supposed to be flying off the canvas |
 |
| Yes, I cut them out, one by one, by hand from a template I made. |
I'm not finished. The girls room is going to be pink with white beadboard and I'm not sure if I want to paint this frame a darker shade of pink or white...so it will stay this way until that happens.
Next is a
 |
| Similar to this one found at Amazon |
 |
| Still seems like it's missing something... |
 |
| The wall will be pink |
 |
| I just love how it turned out! |
xoxo
Krista
Subscribe to:
Posts (Atom)


