Showing posts with label sewing. Show all posts

Tuesday, February 28, 2012

Vintage Books

I've always had a soft spot for old books. The older the better. I started collecting vintage and antique books back in highschool and I'm still collecting today. Now I collect them for myself, to sell in my ETSY shop and the old ones that are in really bad shape, I turn into paper flowers. Here are a few I found the other day.


I like them, but they don't hold anything special for me. So I'll give them a new home where they'll be loved. I also found these:


I love that they all have an outdoorsy theme, which fits my husband and I...I LOVE LOVE LOVE the color combination! I had intended on listing these in my shop, but I've fallen in love with them and am having a hard time letting them go. The books are big (over 10 inches tall) and thick and bright and beautiful...in great shape...Don't you just love my little  ceramic bird next to the Songbirds in Your Garden ?? Here are some more pics, in case you didn't get enough.


For now, I think I'll just let them sit on my shelf and hope that I get time to read them. OK, here are a few of my favorites from my real collection.


From left to right the copyright dates are: 1899, 1940, 1927 I believe the Ernest Hemingway is a first edition second printing...but I'm not an expert so, I'm not sure.


Copyright dates from left to right: Spelling book 1857, History book 1878, Dictionary of facts 1919

Don't you just love the picture on the front of the spelling book? To give you an idea of how old the history book is...the last picture is a list  of all the states added after the original 13...38 total! How cool is that?

Another little piece of history I have is a 1913 Small Arms Firing Manual. It's full of notes and underlines and what I love most of all is the signature in the front. What beautiful handwriting. To me it represents a time when people took their time and pride in everything  they did right down to their handwriting.


I bought this one the other day. It's in descent shape, but what I bought it for was it's pages. For only being 69 years old, the pages have a beautiful rich patina. The pages are also nice and thick and textured. I just had to have it for paper flowers.


Ok, I've saved the best for last! This one my wonderful Sister bought me a few years ago. It has a special place in my studio and in my heart.


It's a 1943 7th and 8th grade Home Ec book.


AND..it shows me how to use my new-to-me sewing machine I bought a few months ago! Here are a few more pics from the book.


I hope I have enjoyed my little treasures...who knows maybe, the next time you're at a used book store, you'll venture over to the old book section and take a look.

xo
Krista

Wednesday, February 1, 2012

Antique 1907 Singer Sewing Machine

This is what I got (myself) for an early Birthday present.


My girlfriend and I were out thrifting and stopped at a little roadside fleamarket. That's where I found her. She not perfect and she's been used A LOT. I've always dreamed of having an antique sewing machine. Although the one in my dreams was shinny and new and in perfect condition. I brought her home and gently cleaned her up...she's missing her front drawer and needs a new belt. Other than that, she's in working order....


... Her name is Shirley, after the woman who taught me to sew... she's worn because someone loved her...and now, I love her.


xo
Krista

Friday, January 13, 2012

Crafter's Block


I have a ton of projects I can do,...tons of material but nothing sounds good to me and the things I do make just aren't "doin' it" for me. I bought a ton of fabric during the after the holidays sales and then I bought some more that I didn't need, then I bought some more just because it was cute, but I don't have a project in mind for it....here's the new additions to my stash.

Linen Print by Robert Kauffman

Peacock Lane by Michael Miller


Just a bunch of fun prints I got at a STEAL!

Top 2 are home deco weight and bottom is a striped tweed.

Corduroy


I already made a few projects out of them...some I don't have pictures for...
Appliqued Purse for me

Minecraft beanbag-pillow for my oldest son.
I used my new Silhouette to cut out the flower and to cut out the heat transfer vinyl. I also used it today to make these new signs for my kids bathroom. I'm working on a Cat in the Hat theme...it's going slow...Someday I'll finish it and have wonderful pictures for you...until then you just get these:


I purchased the SNF Applause font from their online shop and used that...I LOVE the convenience of being able to download their images instantly.

I also made this today...


I was amazed at how well the Silhouette cut such tiny detail....I know...I guess I don't realy have Crafter's Block...it's just that the ideas I do have, I'm not excited about...maybe I'm just in a funk. If you come up with any ideas on what to do with my new fabric, I'd love to heard them. Thanks for listening to me whine.

xo
Krista

+

Saturday, January 7, 2012

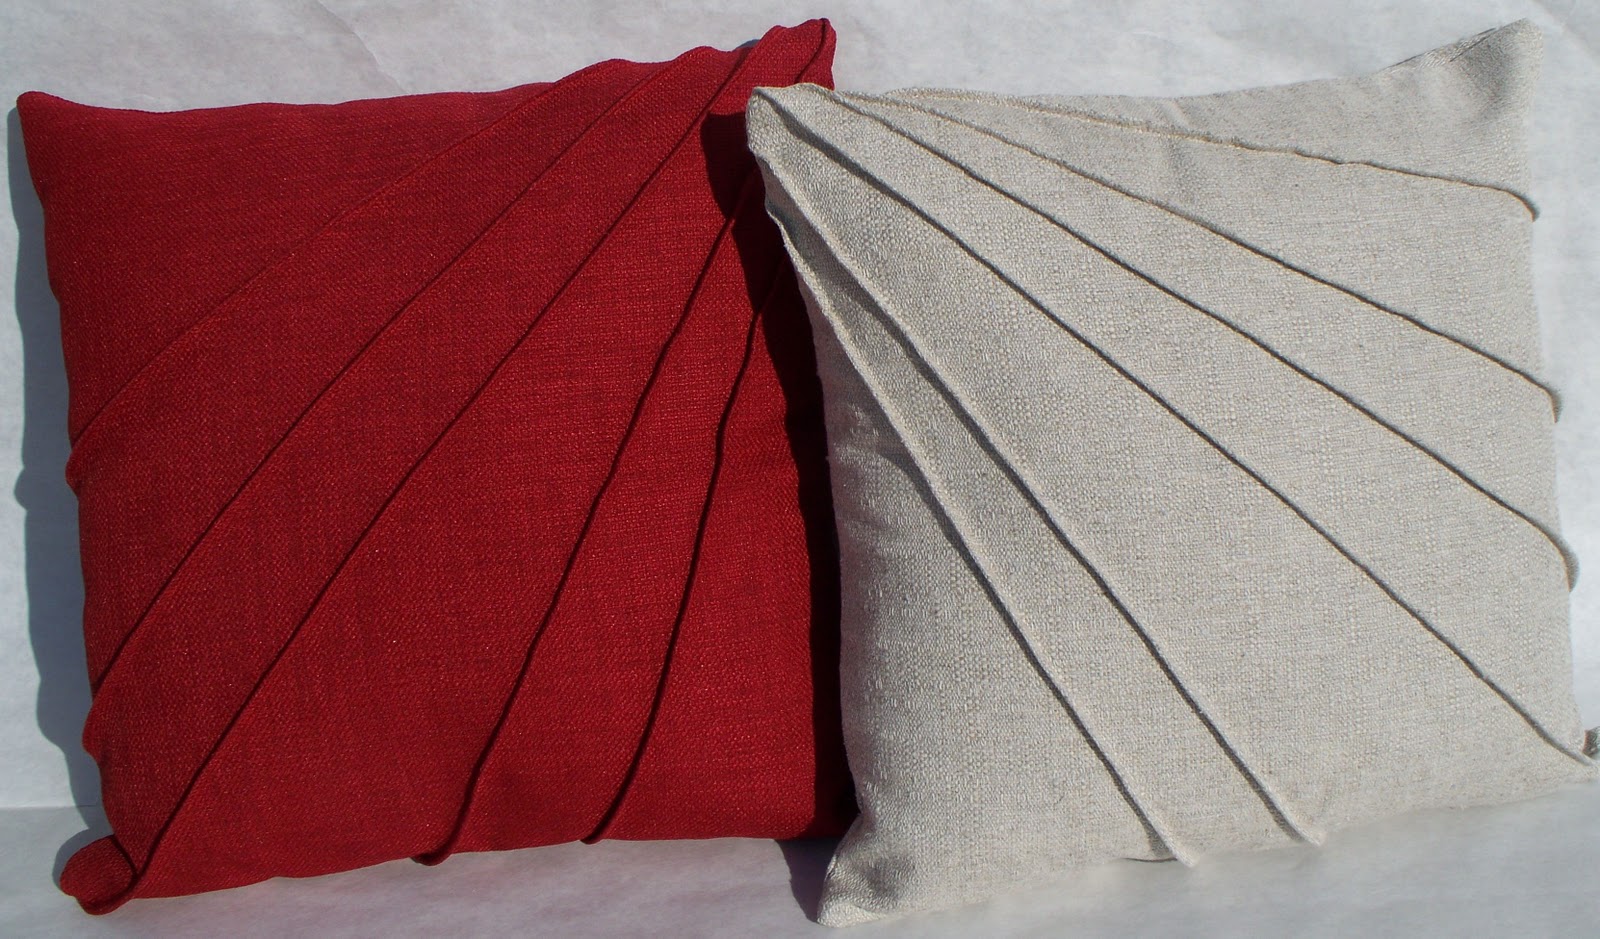
Star-Burst Pintuck Pillow Cover - Tutorial


I think the most intimidating thing about pintucks is that they are all usually uniform. Whether on a pillow or shirt or wherever, you see them in nice, neat, even little rows....but they don't have to be neat or even or intimidating. Here's a fun little project for you to get started with pintucks.

We're going to be creating a fun pillow cover that looks clean and neat and we are not going to measure our pintucks at all...HOW CRAZY IS THAT?...it's not crazy..it's fun and creative and full of whimsy. Keep in mind that I'm using a zippered back for my cover which you can find the tutorial for here.


Star-Burst Pintuck Pillow Cover Tutorial

Supplies 
Fabric for front
Fabric for back
Ruler
Rotary Cutter & Mat or Scissors
Sewing Machine
Coordinating Thread


Cut fabric for the front of your pillow cover to size ( size of pillow + seam allowance + 3")
My pillow is 14". So, I cut my fabric 17.5" square. (14" + .5" + 3")
If you're going to make a hundred pintucks and make them run every which way..you may want to add more than 3" to your measurements..at least the first time.
Cut the fabric for the back of your pillow cover to size (size of pillow + seam allowance)
My pillow back is 15" square AFTER I added a zipper....tutorial on zippered back here.


Fold fabric over, wrong sides together, corner to corner as shown in picture above.


Set your needle placement to the far right. Starting at the long corner, sew along fold..about 1/8" from edge. Just go with what looks nice to you. If you like a tiny pintuck, then go smaller than 1/8".
If you are using thick tread and want a nice top stitch to show, be sure to increase your stitch length just a bit.


Start back at the corner where you started your first stitch and continue sewing pintucks until you are satisfied.


Iron fabric folding all pintucks over to one side. 

Square off  your starting corner as shown above with a rotary cutter or scissors.


Square off the rest of your fabric.
My finished fabric is 15" square.
Pin cover backing to cover front.
Finish edges and trim corners.
Be sure to leave the zipper OPEN before you sew your cover shut as indicated in the picture above. The zipper allows you to turn your cover right side out after you sew all four sides shut.


Your Done!


Linking up to:

Sunday's Best Linky Party!


Friday, January 6, 2012

Pillow Cover with Hidden Zipper - Tutorial


I'm kinda picky when it comes to pillow covers and their openings. Envelope style openings are not my favorite. They're great for when you don't have a zipper or when you want to keep your cost down, but I don't' like how they can bulge out...they don't keep the pillow's shape very well. Buttons are OK and can add a pretty detail to the pillow, but they just don't work in my house with all the hoodlums laying around. I prefer a stuffed pillow where I can throw the whole thing in the wash or a zippered cover. I used to sew my zippers on the side seam. Recently, I came up with a new way to add my zippers. I think it looks much nicer AND I've created a tutorial just for you!

Zippered 14" Pillow Cover Tutorial

Supplies 
Fabric 15" x 33.5"
Ruler
Rotary Cutter & Mat or Scissors
Sewing Machine
Zipper Foot
Coordinating Thread
12" zipper (or longer)

Cut fabric for front 15" x 15"
Cut fabric for back 6.5" x 15" and 12" x 15"


Center zipper on long edge of 6.5" fabric line up right side of zipper to right side of fabric and sew in place using a zipper foot.


Fold fabric back, wrong sides together, leaving a "flap" over right side of zipper and leaving about a 1/4" edge past the other side of the zipper, as shown with the purple arrow in the picture above. Pin in place and sew along previous stitch line. Don't stress about the size of the flap..as long as it covers the zipper and you think it looks good, then it's fine.


Fold "flap" over and pin in place exposing zipper.


Sew other side of zipper to the 12" x 15" piece of fabric, right sides together.  To give you a perspective..the pin indicated by the left arrow is holding the "flap" down. Be sure to line up your fabric edge with your zipper edge (as indicated by the other arrow) and be sure that the edges your 6.5" piece of fabric lines up with the edges your 12" piece of fabric. When you are finished, you should have a rectangle with a zipper in the middle.


Trim excess fabric off the end of the 12" piece so that your pillow cover backing is 15" square....you may ask..."why do I need to trim my fabric? why didn't we cut it right the first time"?..I like to err on the side of caution... it allows me some wiggle room when fiddling with the zipper flap.


Pin cover backing to cover front. Sew using a 1/2" sew allowance. Finish edges and trim corners.  Be sure to leave the zipper OPEN before you sew your cover shut as indicated in the picture above. The zipper allows you to turn your cover right side out after you sew all four sides shut.


Your Done!


LinkWithin

Related Posts Plugin for WordPress, Blogger...